
There’s something irresistibly satisfying about the rich aroma of freshly roasted nuts wafting through your kitchen. Whether you love tossing them into baked goods, sprinkling them over salads, or simply enjoying them as a crunchy snack, mastering the art of roasting nuts at home is a game changer. The best part? It’s incredibly easy — and once you do it yourself, you’ll never want to buy pre-roasted nuts again.

Why Roast Nuts at Home?
Roasting brings out the deep, nutty flavors and intensifies the natural oils, giving each bite a toasty crunch that’s hard to resist. When you roast nuts at home:
- You control the freshness — no stale or over-salted nuts.
- You pick your flavor — sweet, savory, spicy, or plain.
- You avoid unnecessary additives — just pure, wholesome flavor.
Plus, it only takes about 10–15 minutes to turn raw nuts into crunchy perfection.
Step 1: Choose Your Nuts Wisely
You can roast just about any nut, but each one has its own unique flavor and roasting time.
Here are some of the best options:
- Almonds: Great for snacking and baking.
- Cashews: Roast quickly and develop a buttery flavor.
- Pecans: Perfect for pies and desserts.
- Walnuts: Slightly bitter raw, but mellow beautifully when roasted.
- Hazelnuts: Ideal for desserts and spreads.
- Pistachios: Delicious with a light dusting of sea salt.

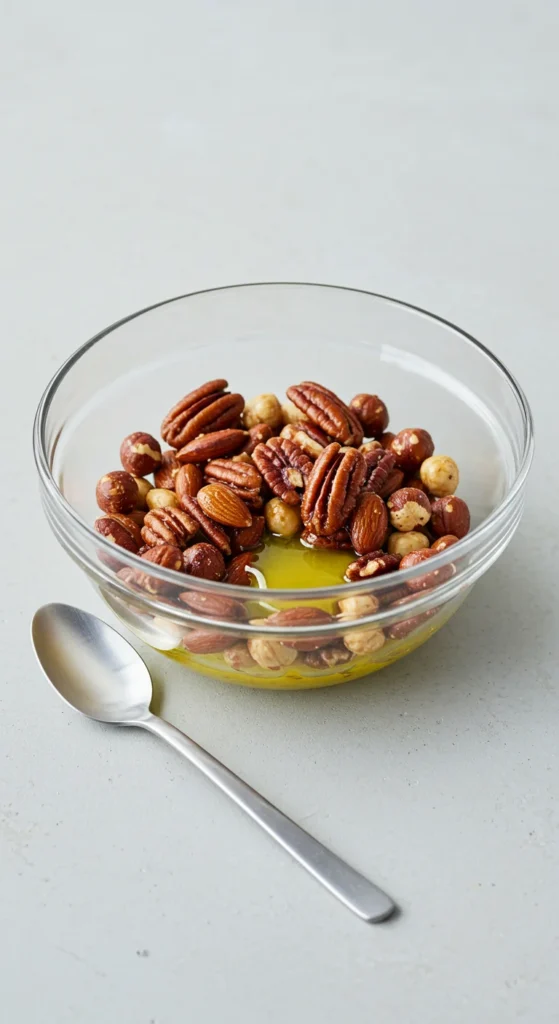
Step 2: Prep for Perfection
Before roasting, prep your nuts for the best flavor and texture:
- Preheat your oven to 350°F (175°C).
- Spread nuts in a single layer on a parchment-lined baking sheet. Crowding the pan can lead to uneven roasting.
- Optional flavor coating:
- Toss with a teaspoon of olive oil or melted butter to help spices stick.
- Add seasoning based on your taste:
- Savory: Salt, garlic powder, smoked paprika, or rosemary.
- Sweet: Cinnamon, vanilla sugar, or maple syrup.
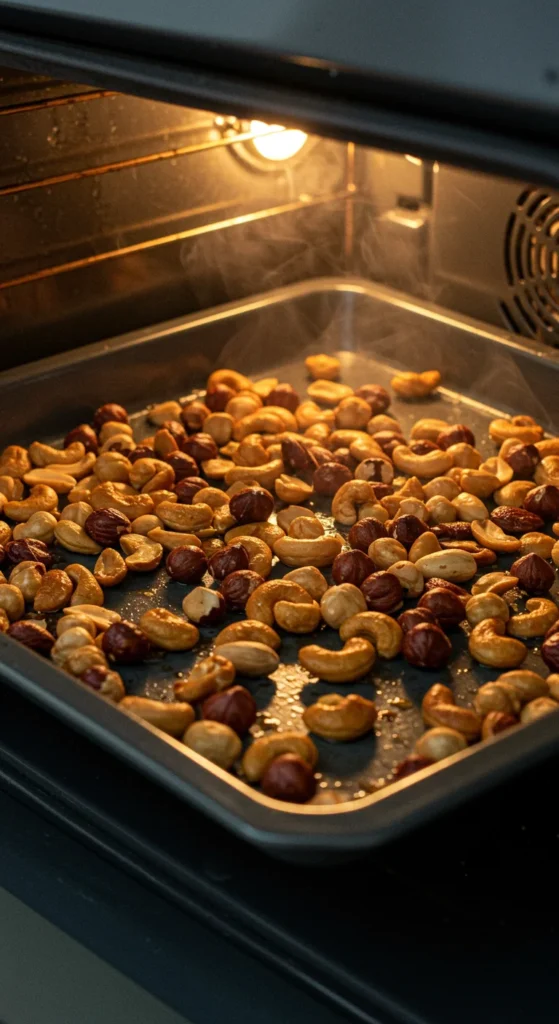
Step 3: Roast, Shake, and Watch Closely
Roasting time varies depending on the nut type and size. As a general guide:
- Almonds: 12–15 minutes
- Cashews: 8–10 minutes
- Pecans: 8–10 minutes
- Walnuts: 7–10 minutes
- Hazelnuts: 10–12 minutes
Pro tip:
Shake the baking sheet or stir the nuts halfway through cooking. This ensures even browning and prevents burning.
Keep a close eye on them during the last few minutes — nuts can go from golden to scorched in seconds!
Step 4: Cool and Store
Once roasted, transfer the nuts to a cool baking sheet or bowl right away to stop further cooking. Allow them to cool completely before storing — this helps them stay crisp.
Storage tips:
- Keep in an airtight jar or container.
- Store at room temperature for up to two weeks.
- For longer shelf life, refrigerate or freeze them in sealed bags.

Flavor Variations to Try
Want to get creative? Here are a few fun flavor ideas to experiment with:
- Sweet cinnamon crunch: Mix warm nuts with brown sugar, cinnamon, and a touch of honey.
- Spicy kick: Toss roasted nuts with cayenne pepper and sea salt.
- Herb delight: Combine thyme, rosemary, and a little olive oil for a savory blend.
- Maple glaze: Drizzle maple syrup over warm nuts and stir until coated and glossy.
Each combination brings a new twist to your snack or baking ingredients!
How to Use Your Roasted Nuts
Once you’ve nailed the roasting process, the possibilities are endless:
- Sprinkle over salads for extra crunch.
- Fold into cookies, muffins, or granola bars.
- Add to yogurt bowls or oatmeal for a protein boost.
- Enjoy as a trail mix with dried fruits and seeds.

Final Takeaway
Roasting nuts is one of those simple kitchen skills that delivers huge rewards. It transforms basic ingredients into flavor-packed snacks and baking treasures. Once you taste freshly roasted nuts from your own oven, you’ll wonder why you ever settled for store-bought ones.
So go ahead — grab a handful of raw nuts, preheat that oven, and roast your way to crunchy perfection.
Save this guide for later and start experimenting with your favorite nut blends today!

Leave a Reply