
Mornings can feel like a race against the clock. You’re trying to get ready, maybe get the kids out the door, answer emails, and somehow eat something more satisfying than a plain piece of toast. That’s where make-ahead breakfast sandwiches come in. Warm, filling, and ready in minutes — they’re the ultimate weekday win.
Even better? You can prep a whole batch in under an hour and enjoy breakfast all week long.

Let’s break it down step by step so you can stock your freezer (or fridge) with easy, homemade breakfast sandwiches.
Why Make Breakfast Sandwiches Ahead of Time?
Before we jump into the how, here’s why this method is such a game-changer:
- Saves time on busy mornings
- Budget-friendly compared to takeout
- Customizable for every family member
- Easy to freeze and reheat
- Perfect for meal prep
Once you try this, it’s hard to go back to last-minute scrambling.
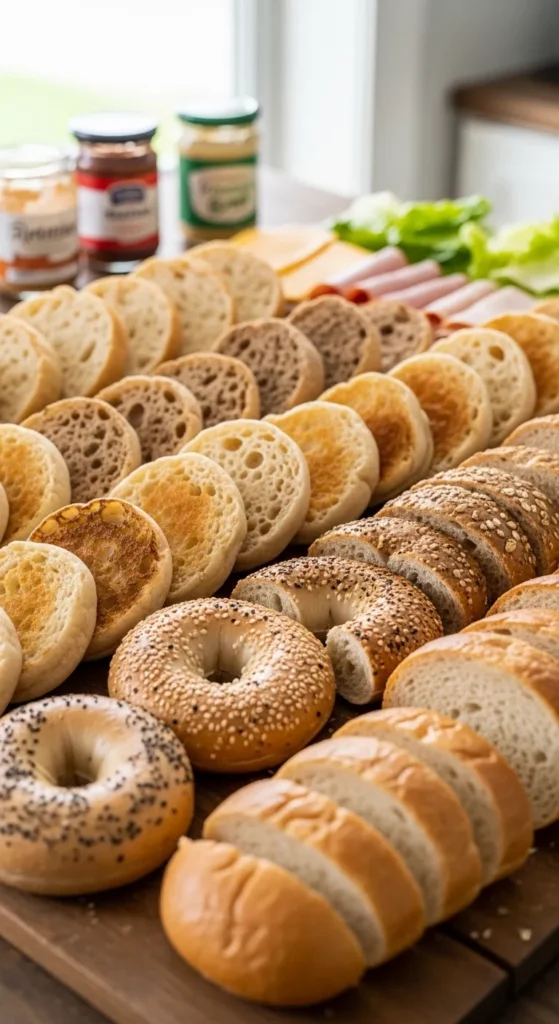
Step 1: Choose Your Base
The foundation of a good breakfast sandwich is the bread. Pick something sturdy enough to hold up in the freezer and during reheating.
Popular options include:
- English muffins
- Bagels
- Croissants
- Whole wheat sandwich thins
- Brioche buns
Slice everything ahead of time so assembly goes smoothly.
Tip:
Lightly toast the bread before assembling. This prevents sogginess later.
Step 2: Prepare the Eggs
Eggs are the heart of most breakfast sandwiches. You can cook them individually, but the easiest method for meal prep is baking them in a sheet pan.
How to Bake Eggs for Sandwiches:
- Preheat oven to 350°F (175°C).
- Grease a baking dish or line it with parchment paper.
- Whisk together 8–12 eggs with a splash of milk, salt, and pepper.
- Pour into the pan and bake for 15–20 minutes until set.
- Let cool slightly, then cut into squares or use a round cutter to match your bread.
This method creates uniform egg portions — no flipping required.

Step 3: Add Protein and Fillings
Now for the fun part — building flavor.
You can mix and match depending on your preferences.
Some delicious options:
- Grilled chicken slices
- Turkey slices
- Plant-based patties
- Sautéed mushrooms
- Spinach
- Roasted bell peppers
- Sliced avocado (add fresh after reheating)
- Cheddar, mozzarella, or pepper jack cheese
Layering tip:
- Bottom bread
- Egg
- Protein
- Cheese
- Veggies
- Top bread
Keep wet ingredients (like tomatoes or avocado) out if you’re freezing — add those fresh when serving.

Step 4: Wrap and Store Properly
Proper storage is the secret to keeping your sandwiches tasting fresh.
For Refrigerating (up to 4 days):
- Wrap each sandwich tightly in parchment paper or foil.
- Store in an airtight container in the fridge.
For Freezing (up to 2 months):
- Wrap each sandwich in parchment paper.
- Add a layer of foil or place in a freezer-safe bag.
- Label with the date.
Avoid plastic wrap directly on warm sandwiches — let everything cool completely before wrapping to prevent condensation.
Step 5: Reheat the Right Way
Reheating can make or break your sandwich. Here’s how to do it properly:
From the Refrigerator:
- Microwave for 45–60 seconds.
- If possible, finish in a toaster oven for 2–3 minutes to crisp the bread.
From the Freezer:
- Remove foil.
- Wrap in a paper towel.
- Microwave for 1–2 minutes, flipping halfway.
- Optional: Toast briefly for better texture.
If you have extra time, reheating in the oven at 350°F for 10–15 minutes gives the best results.

Flavor Combinations to Try
If you want variety during the week, prep different combinations in one batch.
Classic & Comforting
- Egg
- Cheddar cheese
- Grilled chicken
Veggie-Packed
- Egg
- Spinach
- Roasted peppers
- Mozzarella
Spicy Kick
- Egg
- Pepper jack cheese
- Sautéed onions
- Hot sauce (added after reheating)
Make 2–3 varieties so breakfast never feels repetitive.
Common Mistakes to Avoid
Even simple recipes have a few traps.
Here’s what to watch out for:
- Skipping the cooling step before wrapping
- Overloading with watery vegetables
- Not toasting the bread slightly
- Microwaving too long (which makes eggs rubbery)
A little attention here makes a big difference.
Make It a Weekly Habit
The best part about make-ahead breakfast sandwiches? They quickly become routine.
Set aside 45 minutes on Sunday:
- Bake the eggs
- Prep fillings
- Assemble
- Wrap and store
That’s it.
For the rest of the week, breakfast is ready in under two minutes.
And honestly, there’s something deeply satisfying about opening your freezer and seeing a row of homemade sandwiches waiting for you.
Breakfast doesn’t have to be rushed or boring. With just a little prep, you can enjoy warm, hearty sandwiches any day of the week — no drive-thru required.
Save this recipe for later, and make your mornings so much easier!

Leave a Reply