
There’s something special about the smell of freshly baked granola wafting from your kitchen — warm oats, toasted nuts, and just the right hint of sweetness. Making your own granola isn’t just easy; it’s one of the most satisfying ways to start your day or prep a wholesome snack that keeps you energized. Once you learn how to make it, you’ll never go back to store-bought again.
Why Make Your Own Granola?
Homemade granola gives you full control over the flavor, texture, and nutrition. No hidden sugars or preservatives — just the good stuff. You can tailor it to your taste, whether you like it extra crunchy, packed with nuts, or filled with chewy dried fruit.
Plus, it’s a perfect meal prep item. You can make a big batch on Sunday and enjoy it all week long for breakfast, snacks, or even dessert toppings.
Gather Your Ingredients
Before you begin, make sure you have the essentials on hand. Granola is flexible — feel free to mix and match ingredients you love.
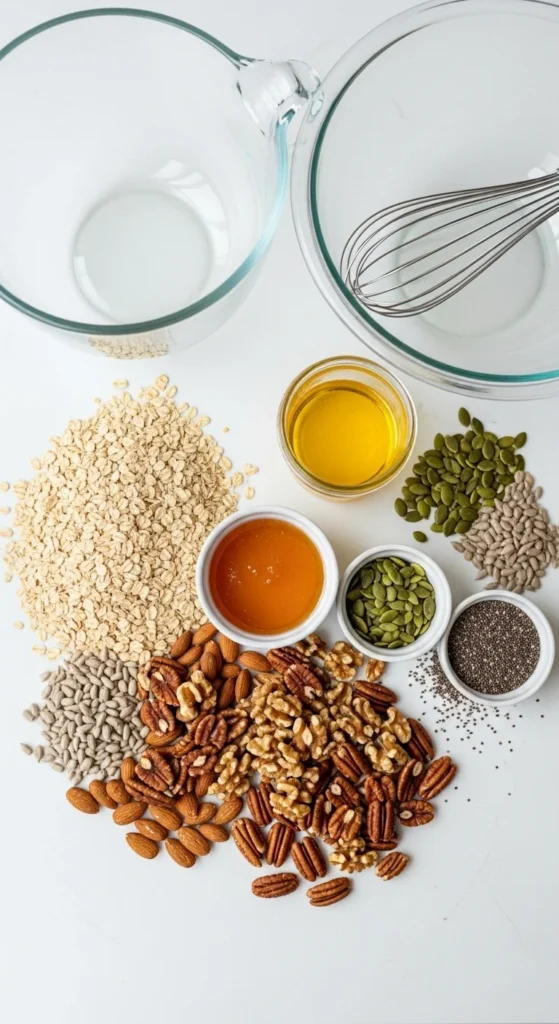
Base Ingredients:
- 3 cups rolled oats
- 1 cup nuts (almonds, pecans, or walnuts work great)
- ½ cup seeds (pumpkin, sunflower, or chia)
- ½ cup shredded coconut (optional)
Sweeteners & Binders:
- ⅓ cup honey or maple syrup
- ¼ cup coconut oil (melted)
- 1 tsp vanilla extract
- ½ tsp salt
Add-ins (after baking):
- ½ cup dried fruit (raisins, cranberries, apricots, or cherries)
- ¼ cup chocolate chips (optional, for a treat)
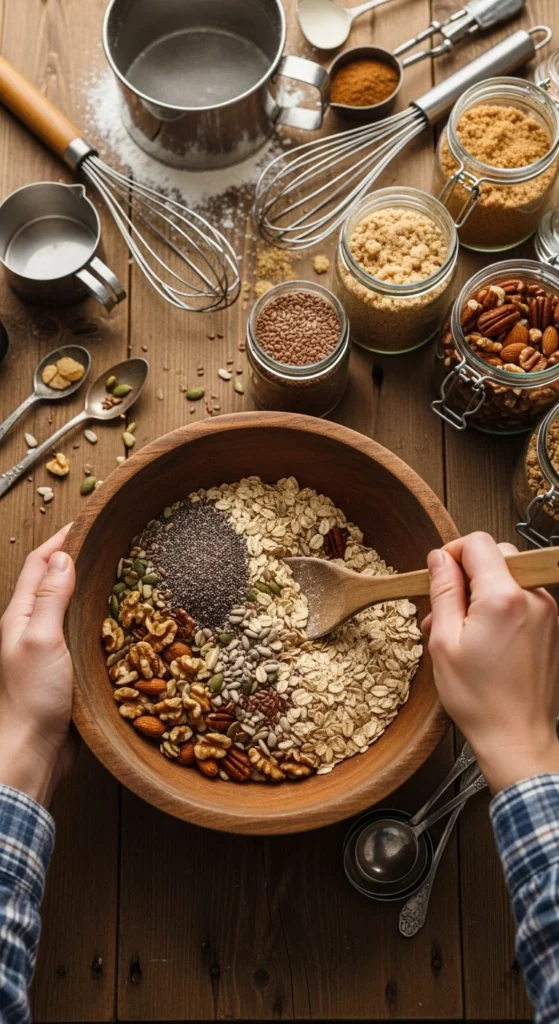
Step 1: Mix the Dry Ingredients
In a large mixing bowl, combine the oats, nuts, seeds, and shredded coconut. Stir everything well so it’s evenly distributed. This base gives your granola its signature crunch.
Tip: Use old-fashioned rolled oats instead of quick oats. They bake better and hold their shape.
Step 2: Add the Wet Ingredients
In a smaller bowl, whisk together honey (or maple syrup), melted coconut oil, vanilla extract, and salt. Pour this mixture over the dry ingredients and stir until everything is evenly coated.
The sweetener and oil combo is what helps the granola clump and crisp as it bakes — so don’t skip this step!
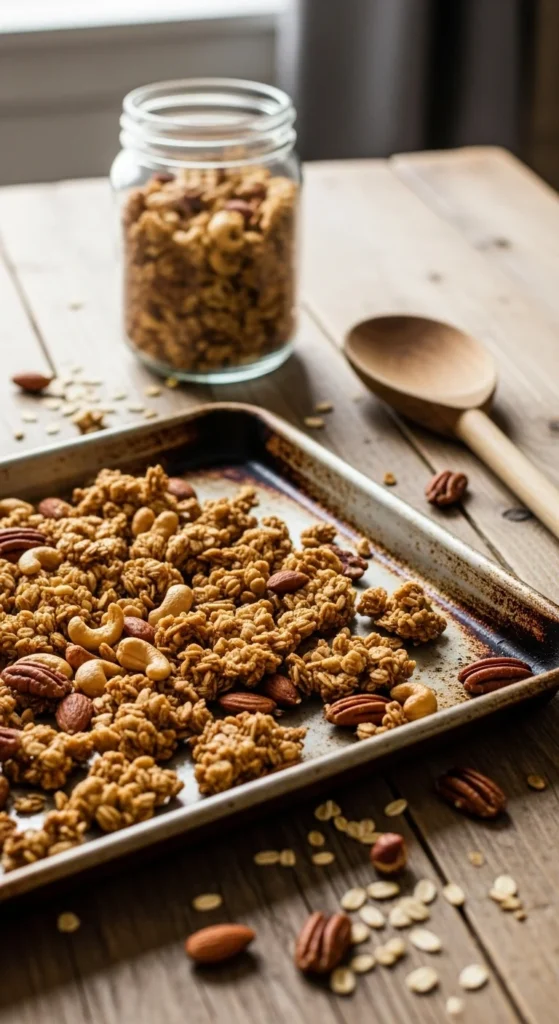
Step 3: Bake to Golden Perfection
Spread the mixture onto a parchment-lined baking sheet in an even layer. Bake at 325°F (160°C) for 25–30 minutes, stirring halfway through to ensure even toasting.
Keep a close eye during the last 5 minutes — granola can go from golden to burnt quickly.
Pro Tip: For chunkier granola, avoid stirring too much while baking. Let it cool completely before breaking it apart.

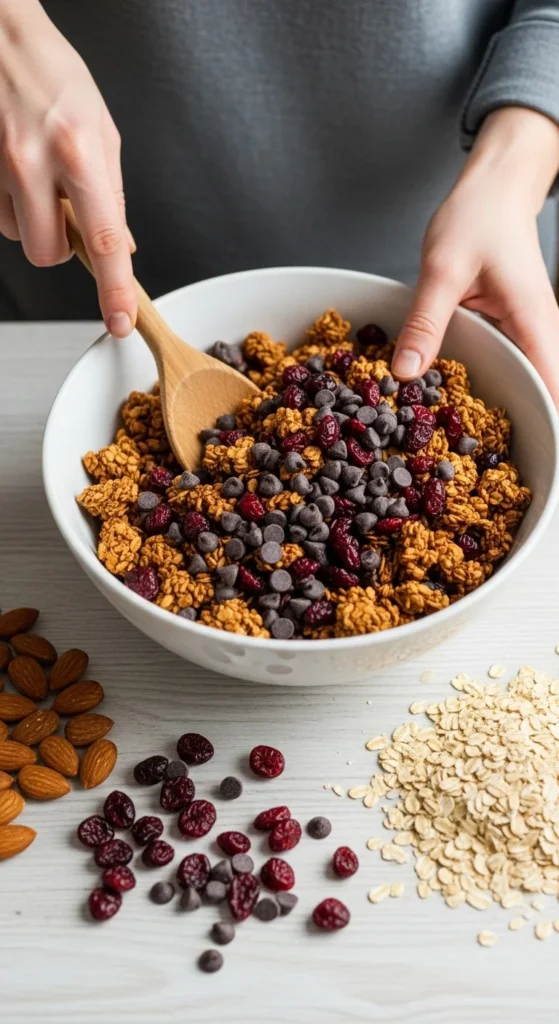
Step 4: Add Dried Fruits and Extras
Once your granola has cooled completely, it’s time to mix in dried fruit or other extras like chocolate chips. Adding them after baking prevents melting or burning.
Try combinations like:
- Dried cranberries + almonds for a tart crunch
- Dried apricots + pistachios for a Middle Eastern flair
- Raisins + pecans + coconut for a tropical twist
Step 5: Store It Right
Store your homemade granola in an airtight container or glass jar. It will stay fresh for up to 2 weeks at room temperature or longer in the refrigerator.
If you love having grab-and-go snacks, divide portions into small jars or reusable bags for quick breakfast parfaits or trail snacks.
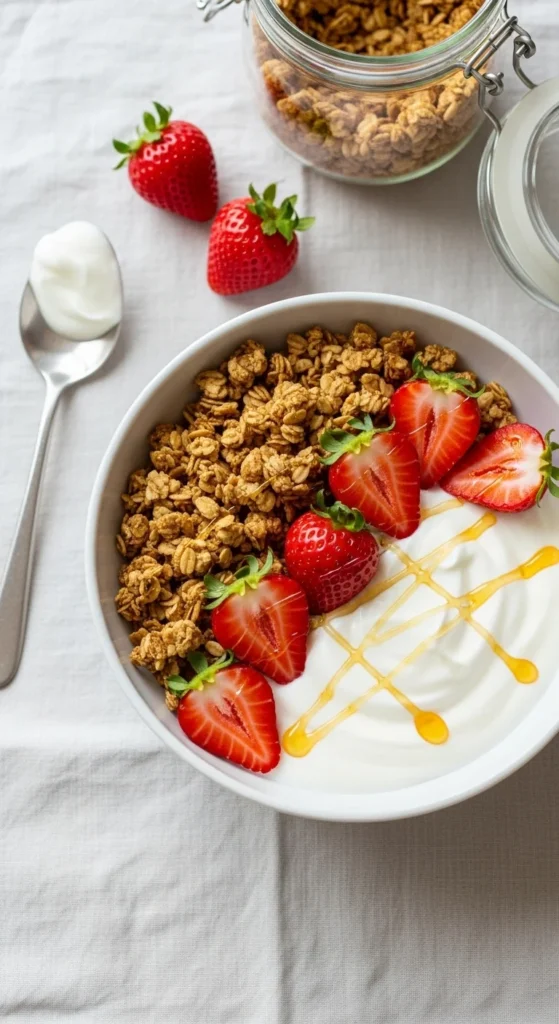
How to Enjoy Your Granola
The beauty of homemade granola is its versatility! Try it in:
- A breakfast bowl with yogurt and fresh berries
- Smoothie bowls for a crunchy topping
- Trail mix, mixed with dried fruit and a handful of chocolate chips
- Desserts, like sprinkled over ice cream or fruit crisps
Quick Variations to Try
Once you master the basic recipe, have fun experimenting:
- Nut-Free Granola: Replace nuts with sunflower or pumpkin seeds.
- Chocolate Granola: Stir in cocoa powder before baking.
- Spiced Granola: Add cinnamon, nutmeg, or pumpkin spice for cozy flavor.
- Protein Boost: Mix in a few tablespoons of hemp or chia seeds.
Final Takeaway
Making homemade granola is simple, rewarding, and endlessly customizable. It’s a pantry staple you’ll love having around — crunchy, wholesome, and perfect for any time of day.
So next time you’re craving something satisfying, skip the store-bought box and make your own batch of golden, crunchy granola.
Save this recipe for later — your mornings just got a lot more delicious!

Leave a Reply