
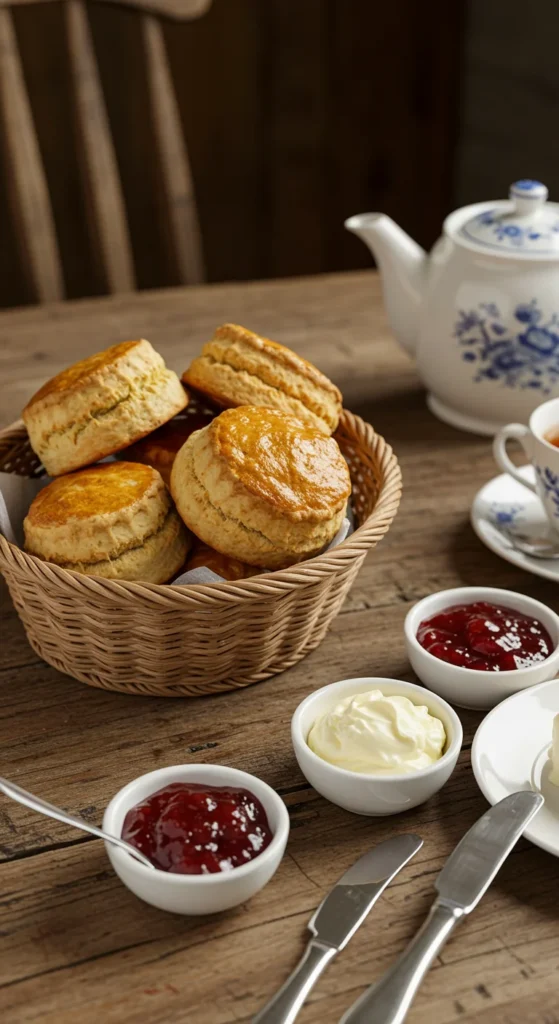
There’s something timeless and comforting about sitting down to a cozy afternoon tea with freshly baked scones. Their golden crust, soft crumb, and slightly sweet aroma make them irresistible—especially when paired with a generous dollop of cream and a spoonful of jam. Whether you’re hosting guests or treating yourself, scones are surprisingly easy to make and perfect for turning an ordinary afternoon into something special.
The Secret to Perfect Scones
Making scones isn’t complicated, but achieving that light and fluffy texture takes a few key tricks. The goal is to handle the dough as little as possible—overworking it can make your scones dense instead of airy.
Key Ingredients
- Flour: Use all-purpose flour for classic texture. For extra lift, a self-rising version works beautifully.
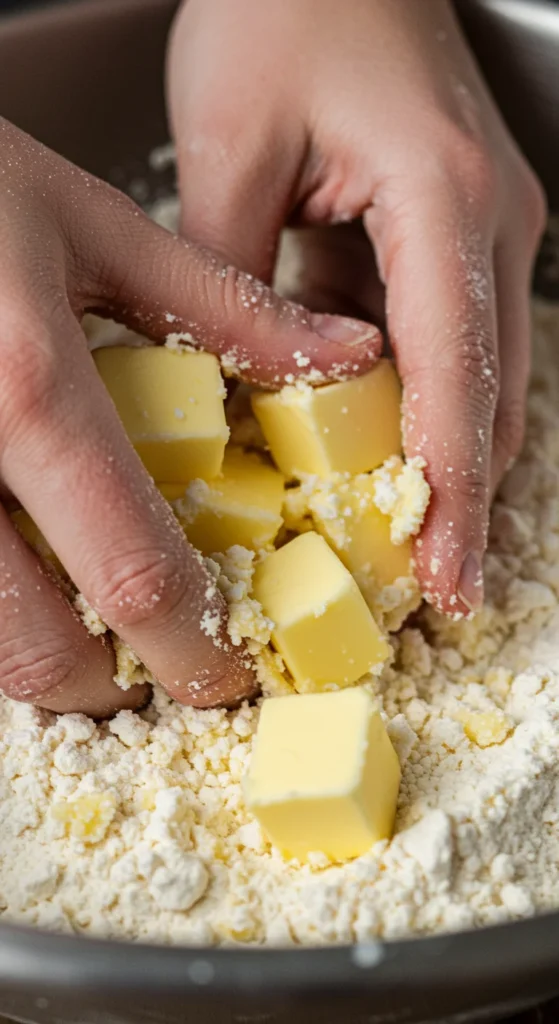
- Butter: Cold, unsalted butter is essential. It should be firm enough to grate or cube easily.
- Sugar: A touch of sugar adds sweetness but keeps the flavor balanced.
- Milk or Cream: Brings richness and moisture. Some bakers swear by buttermilk for an extra tender crumb.
- Leavening Agent: Baking powder is what gives scones their signature rise.
Pro Tip:
Keep all your ingredients as cold as possible until baking. Cold butter creates steam pockets that help scones puff up beautifully in the oven.
Step-by-Step: Making the Dough
1. Mix Dry Ingredients
In a large mixing bowl, combine flour, sugar, baking powder, and a pinch of salt. Give it a quick stir to distribute everything evenly.
2. Cut in the Butter
Add your cold, cubed butter to the bowl. Using a pastry cutter or your fingertips, rub the butter into the flour until the mixture looks like coarse crumbs with a few pea-sized bits remaining. Those little butter pockets are what make scones so soft inside.

3. Add Wet Ingredients
Pour in milk or cream and stir gently with a fork until a rough dough forms. It’s okay if it looks a little shaggy—don’t overmix! If you’d like to add extras like dried cranberries, blueberries, or chocolate chips, now’s the time.
4. Shape the Dough
Turn the dough onto a lightly floured surface and gently knead it just a few times to bring it together. Pat it into a circle about 1 inch thick. Use a round cutter (or a glass) to cut out your scones.

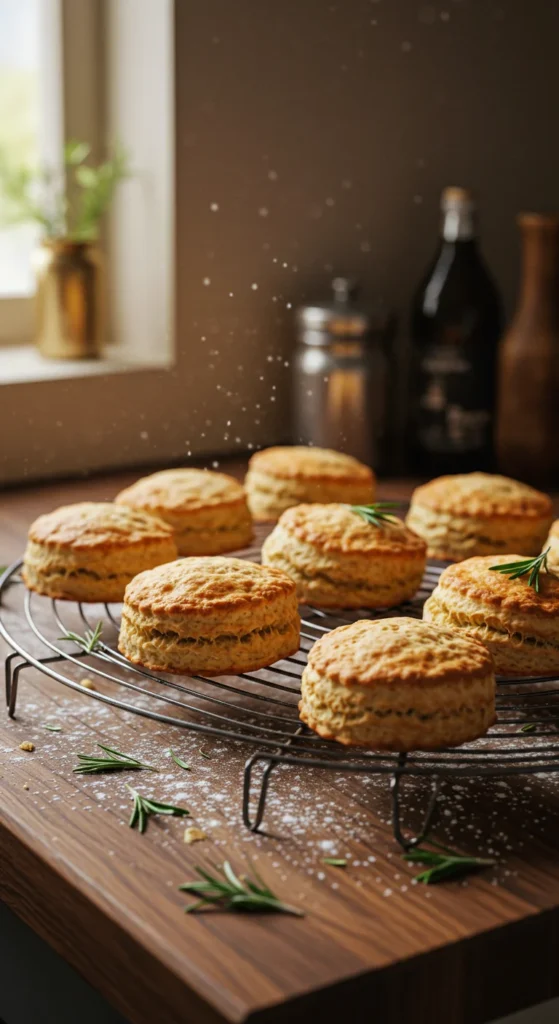
5. Bake to Golden Perfection
Place the scones on a baking tray lined with parchment paper. Brush the tops lightly with milk or cream for a golden finish. Bake at 400°F (200°C) for about 12–15 minutes, or until they’re golden brown on top.
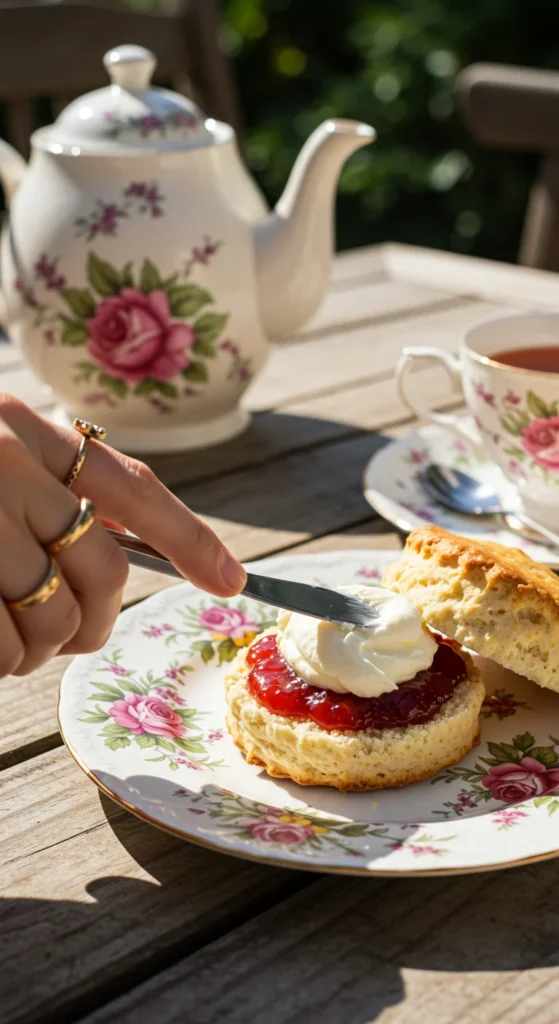
Serving Your Scones the Traditional Way
Freshly baked scones are best enjoyed warm. The classic pairing is simple and elegant—clotted cream and strawberry jam. But you can also get creative with flavored butters, lemon curd, or honey.
Here’s how to serve them like a pro:
- Split the scone in half while still warm.
- Spread a thick layer of clotted cream (or whipped cream if unavailable).
- Add a spoonful of jam on top for a sweet, glossy finish.
Optional Variations
- Fruit Scones: Add currants, raisins, or cranberries.
- Savory Twist: Mix in grated cheese and chopped herbs.
- Glazed Scones: Drizzle a simple powdered sugar glaze for a bakery-style touch.
Tips for Fluffy, Moist Scones
To make sure your scones turn out light and tender every time, keep these quick tips in mind:
- Don’t over-knead: Handle the dough gently—less is more.
- Keep it cold: The colder the butter and milk, the better the rise.
- Bake immediately: Once the dough is ready, get it in the oven right away for the best results.
- Check for doneness: Scones should sound hollow when lightly tapped on the bottom.
A Treat Worth Sharing
There’s something magical about the simplicity of scones. They come together in minutes but feel like a luxurious treat—perfect for a lazy Sunday, a cozy afternoon with friends, or even a last-minute brunch. Each bite is soft, buttery, and comforting, especially with a steaming cup of tea.
So next time you’re craving something homemade and heartwarming, whip up a batch of these golden delights. You’ll be surprised how easily they become your go-to bake for any occasion.
Save this recipe for later and bring a little British charm to your next afternoon tea! ☕

Leave a Reply